Carbon Fibre Damage Inspection & Repair Techniques
Useful Notes
Before doing anything, please read out health and safety notes.
You may also find it useful to visit the What is Carbon Fibre? section.
Information on structural properties of carbon fibre, choices of resin type, fibre type and influencing factors on material selections can be found at
- Rapra
Help and problem solving on polymer problems can be found at
- West System - Problem Solver Guide - www.westsystem.com (page link)
Reverie offer pre-cured flat sheet, sandwich panels and angle, suitable for composite repairs. We also offer a range of paste adhesives for the bonding of Carbon Fibre, GRP, metals & plastics.
Damage & Effects:
Chipping: Local fracturing and bond separation of the surface ply. Effects depend on thickness of laminate.
Notches: Damage affects the stressed plies but does not extend through the full thickness of the laminate. Effects depend on the depth of the notch relative to the laminate thickness.
Bearing Damage: Local damage around fasteners, caused by over-tightening or incorrect use of fasteners. Damage is of a complex nature and includes fibre fracture resulting in a reduction in stiffness of the joint.
Trans-laminar cracking: A crack running in the matrix, or fibre to matrix interface, parallel to the fibres. Usually confined to one ply (or block of plies having a similar orientation) and will be aligned approximately to the plane of the laminate.
Bond failure: Loss of adhesion between two adjacent surfaces.
Matrix cracking: Aging of the polymer resin causing reduced compression and inter-laminar strength.
More serious damage of the above types will usually be accompanied by de-lamination.
De-lamination: Separation of plies leading to catastrophic failure of the laminate. It is of major importance, especially in thin compression loaded skin panels or in thick panels subjected to inter-laminar shear loading.
Surface Protection:
Although CFRP does not corrode, scratches in the surface must be repaired with fillers or resin to prevent stressed internal plies from being affected by environmental factors.
Polished epoxy laminate mouldings can have exposed fibres resealed with epoxy adhesive such as clear DP100. Once the resin is set it can be sanded and polished. Epoxy laminates are not UV stable and the surface should be regularly treated with a UV filter screen such as 606 or Armor-All protectant.
Alternatively a protective surface film or gel coat may be applied to the mould before the laminate is added. Another option is to paint the part. Once the moulding is cured the surface may be abraded and then spray or brush coated with 2K colour paint/clear lacquer or polyurethane varnish to give long lasting UV protection. However the bare polished epoxy laminate is much more scratch resistant and harder wearing than a painted finish.
Repairs:
Cured composites are very suitable to being bonded & repaired. The size and location of the defective area needs to be established, which is not always visible, as the failure or impact damage can have wide spread hidden de-lamination. A simple tap test will reveal defective areas, with a dull sound indicating damage. The extent of the damage can be mapped using this simple technique. For safety critical areas ultrasonic, x-ray or infrared thermography inspection techniques should be used to identify the extent of the defect.
Bonded Repairs
For cosmetic repairs on painted parts a filler or adhesive such as 3M DP490 is suitable. For clear epoxy carbon cosmetic repairs a clear epoxy adhesive such as 3M DP100 is spread/injected into the damaged area. Once set the surface may be flatted and polished.
For structural damage then two types of repairs can be used, flush scarf patches and external patches. Again we recommend 3M DP490 (black) for service temps upto 90°c, or DP760 (white) for service temps above this. For bonded joint repairs the viscosity of these products is fine, but for laminated repairs the mixed adhesive needs to be warmed carefully with a heat gun to drop its viscosity and allow easy impregnation of the dry fibre mat. Alternatively laminating repairs can be made with a suitable laminating resin system.
N.B. Nylon peel ply can be applied onto the back of wet laminated parts to improve the surface finish. Once cured this can be ripped off to leave a consistent fine grit finish.

Flush Scarf Patches
Used where surface smoothness is required to disguise the repair and provide the highest joint efficiency, with a strength approaching that of the original structure. Thick monolithic structures are ideal for such repairs. Patches can be cured on the damaged laminates, or pre-cured and then boned to the damaged component. If the gap between the scarfed laminates is great then the part may need to go back into a released mould tool. If a mould tool is not available then you may need to make a mould tool section from another PVA, silicone taped or Simonz wax released donor part. The mould need only be made slightly larger than the localised repair area and can be made quickly and simply from AVHV1580 epoxy repair putty available from www.johnburn.co.uk. Alternatively if the damaged area was simple you may be able to bridge across with 2-3mm thick sheet wax, again available from www.johnburn.co.uk

External Patches
A visible repair that is simple to apply requiring less preparation than a scarf repair. It can be applied as layers of wet laminate or as a bonded-on pre-cured patch. The disadvantage is the uneven load path. The patch will therefore see high peel and sheer stresses at the damaged edge, with the resulting repair approximately 60% the strength of the original structure. Sometimes a thinner external patch can be used with a scarf laminated repair on the reverse side, to bring the strength back.

Bolted Repairs
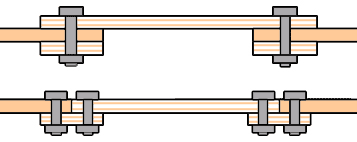
Available as a flush or external patch. These are used when a bonded scarf approach is too complex to prepare. This type of repair is very visible but easy to apply. Providing it is designed correctly & the parent laminate can offer sufficient bearing strength for the bolts, the repair can approach the strength of the original structure.


